Amazon

02 August 2012

Shapie Decorated Mug: A Tutorial

This craft was also inspired by this post that I saw on Pinterest by A Beautiful Mess. I wanted to make a customized mug with which to drink my tea this September. I really liked the simplicity of the Sharpie on the white mug and the drawn-on teabag.  Here's my version.

Tutorial

What You Need: a white mug (I got mine from the Christmas Tree Shop for $1), and a Sharpie marker


Step 1: Draw your design on the mug.  This is where you can be creative.  I'm a fan of quotes, so I chose to write a quote by C. S. Lewis that reads: "You can't get a cup of tea big enough or a book long enough to suit me."  I also drew the tag of the tea bag like on the inspiration mug.


Step 2: Bake the mug in the oven at 350 degrees Fahrenheit for 30 minutes.  After it is finished, let it cool in the oven, because it will be very hot.


That's all there is to it! I would recommend hand-washing the mug just to ensure that the design stays on.  Sharpie markers are not actually meant to write on glossy surfaces like mugs.  If you want the design to stay on better, invest in an actual ceramics marker. However, for a $1 investment, I'd say that this is pretty good.
~~~~~~~~~~~~~~~~~~~~~~~~~~~~~~~~~~~~~~~~~~~~~~~~~~~~~~~~~~~~~~~~~~~~~~~~~~~~~~ Get everything you'll need now

31 July 2012

Painted Canvas Quote Poster: A Tutorial

This project was inspired by this post that I first saw on Pinterest and comes from the lovely ladies at A Beautiful Mess.  I decided that I wanted to make my own to hang in my dorm room.


First I used large canvas that I got in at Micheal's and painted it with rainbow splotches.  You can really paint any background you want.


Then, I chose my quote and cut out the stickers that I need.  My quote is, "Go confidently in the direction of your dreams! Live the life you've imaged" by Henry David Thoreau.  After I placed the stickers, I drew guidelines on the canvas and stuck them on.


After I made sure the stickers were down securely, I poured white paint all over the canvas.


Then I spread the paint around.  It took three coats of white to sufficiently cover the rainbow underneath.


Once the white was dry (I used a hairdryer to speed up the process) I peeled off the stickers, and ta da! A great poster with one of my favorite inspirational quotes.

19 June 2012

How to Make Ratatouille from the Movie (Confit Byaldi)


One of my favorite recipes to make is this spin on traditional ratatouille, called Confit Byaldi.  It was created specifically for Pixar's movie "Ratatouille" by French Laundry chef, Thomas Keller.  You can see the original recipe here. Enjoy!


Ingredients: 

  • 3 peppers (red, orange, yellow)
  • 1 onion
  • Minced garlic
  • Extra virgin olive oil
  • 1 large can of diced tomatoes
  • Thym
  • Parsley
  • 1 bay leaf
  • 1 zucchini
  • 1 yellow squash
  • 1 egg plant
  • 4 roma tomatos
  • Balsamic vinegar

Step 1: Preheat the oven to 450 degrees Fahrenheit.


Step 2: Cut each pepper in half, and take out the ribs and the seeds.


Step 3: Place the peppers on a piece of tin foil on a baking pan.  Put in the oven, and let roast for 15 minutes.  When they're done, let them cool.


Step 4: While the peppers are in the oven, finely chop up the onion.


Step 5: Put the chopped onion in a pan along with 2 Tbs. oil and 1 tsp. garlic.  Stir under low heat until the onions are soft, but not brown.  This will take about 8 minutes.


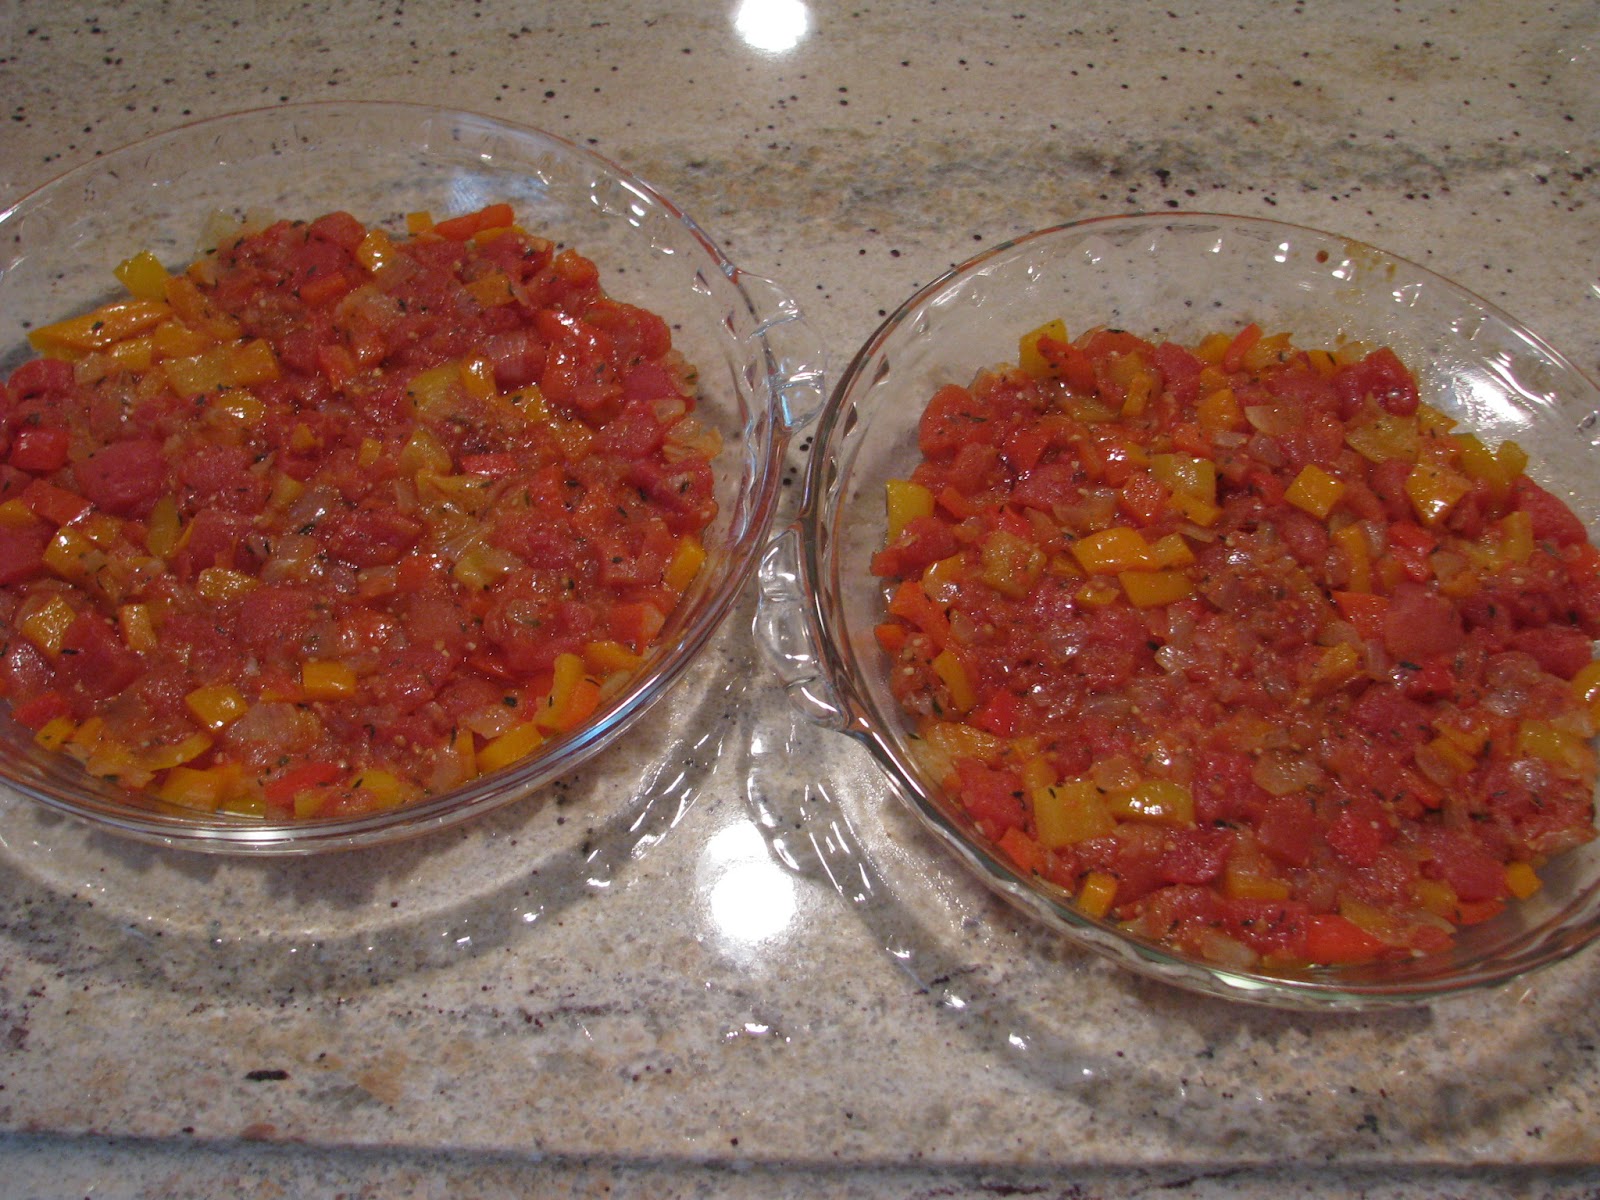
Step 6: Drain the diced canned tomatoes and add that to the pan after the onions have been softened.  Stir in too the bay leaf, parsley, and thyme.  Let the entire mixture simmer until the juices have mostly evaporated.


Step 7: While that is simmering, take your peppers (which should be cool by now) and peel the skin off of them.  Don't worry if all the skin doesn't come off.  After that, cut them up into tiny squares.


Step 8: Add the peppers to the mixture in the pan; stir.  Cover and let simmer, stirring occasionally.


Step 9: While that's simmering, preheat the oven to 275 degrees Fahrenheit.


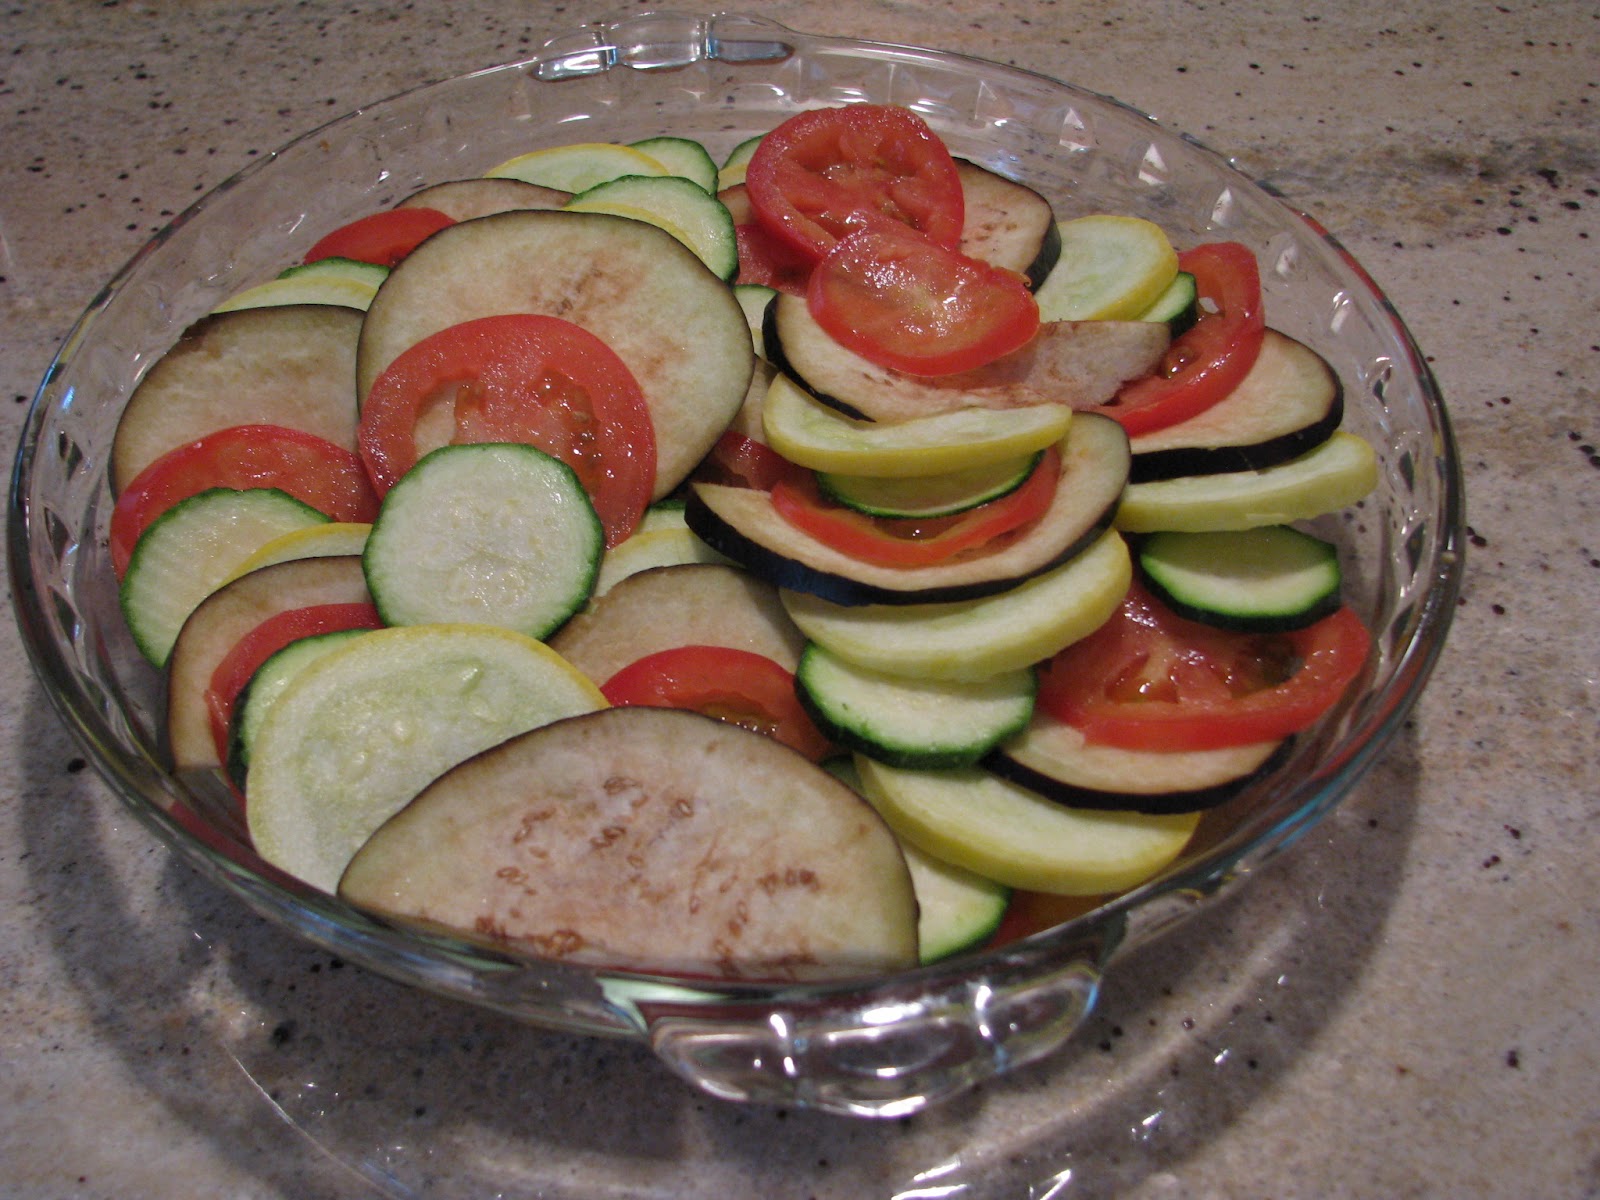
Step 10: Slice up the zucchini, yellow squash, eggplant, and Roma tomatoes.  Put them all in separate bowls.


Step 11: Take the tomato, onion, and pepper mixture off the stove.  Set aside a spoonful of it in a cup.  Put the rest on the bottom of a pan or two pans, depending on how much you have.  I used two 8 inch pans.


Step 12: Now it's time to start layering the vegetable slices.  Choose an order that you like, I did: zucchini, squash, eggplant, tomato (and repeat).  Begin by layering one on top of the other down the center of the pan.  Then spiral around the other edge.  When you make a full rotation, spiral the vegetables in towards the center.  Continue spiraling until the entire pan is covered.


Step 13: Drizzle the top of the vegetables with a mixture of olive oil, thyme, and garlic.


Step 14: Cover the pans with tin foil and scrunch it on the bottom.  Put them in the oven for 2 hours.  After the two hours are up, take the tin foil off and leave them in the oven uncovered for another 30 minutes.


Step 15: Time to make the vinaigrette! In my opinion, this makes the meal.  It's really simple, just add olive oil and balsamic vinegar to the tomato mixture that was set aside earlier.  Store it in the refrigerator.


Step 16: Take the ratatouille out of the oven and enjoy!  I usually like to eat it with pasta.  Tell me what you think and just comment if you have any questions.


06 June 2012

Tea Stained "TOMS" Shoes: A Tutorial


I really wanted a pair of TOMS shoes for the summer, but they are way out of my budget. Luckily, I found a pair of these Toms look-a-likes at Target for only $17.  I didn't like the bright white, though, so I decided to dye the shoes with tea.  The inspiration for this project comes from Sweet Verbena.

Tutorial

You will need: white canvas shoes, tea, and Sharpie markers.


Step 1: Remove the inserts from the shoes. You do not want these getting wet when you dye your shoes.


Step 2: In the sink, run your shoes in water.  If the fabric is wet, it will absorb the dye more readily.  Set shoes aside.


Step 3: In a large pot, boil enough water to cover your shoes.  I used 24 cups.  Make sure that you keep track of how many cups of water you put into the pot.


Step 4: Remove the strings and tags from as many teabags as cups of water you are boiling.  When the water comes to a boil, lower the heat and add the teabags.  Stir gently and let steep for 5 minutes.

Step 5: Fish out the teabags and discard them.  Put your shoes into the pot of tea and squish them down to make sure that they are fully submerged.  Let them soak and check them every 5-10 minutes.

Step 6: When the shoes are darker than you want them to be, take them out of the pot and rinse them in warm water and soap.  The color of the shoes will lighten.

Step 7: Put your shoes through the washer and dryer.


Step 8: Decorate as you wish with a Sharpie marker (optional).  I tested this and didn't like how it turned out, so I wished that I had left the shoes as they were.  This led to a whole debacle, and eventually I ended up painting the part with the Sharpie.

The Mistake


So there you go!  Simple summer shoes that look like Toms, but at the fraction of the price.  Something that I learned during this project: if you like how something looks, just STOP working on it.  Less is more.  I should not have tried to decorate the shoes with Sharpie, and eventually tried to recreate what the shoes looked like before.  If I had just stopped, I would have been saved all that time and effort.


  ~~~~~~~~~~~~~~~~~~~~~~~~~~~~~~~~~~~~~~~~~~~~~~~~~~~~~~~~~~~~~~~~~~~~~~~~~~~~~~ Get everything you'll need now

31 May 2012

Making My Own Prom Dress: Part 3

The dress is finally finished! After much work (and blood, sweat, and tears) I was able to wear it to the fashion show and prom.

On the bodice and the skirt there are two layers of fabric: emerald green organza over glittery emerald green satin.  Both are from Joann's Casa Collection.  The glitter satin is exposed on the waistband.  By far, the hardest part of completing the dress was putting the gather in on the organza.  The fabric kept on fraying and slipping.

After the dress was completed, I decorated the waistband.  I added square gemstone trim that I also purchased from Joann's.  There wasn't enough of it in stock to do two rows around the entire dress, so I just put the two rows on the front.  The decorative gem piece in the middle of the waistband was actually taken from another dress that I own.  I just cut it off and sewed it onto my prom dress.

The prom theme was "Masquerade Ball", so I also decided to make this masquerade mask.  I made it out of aluminum foil, newspaper, paper towels, a chopstick, and paint.  That was made last minute, so I think it would have been more ornate if I just hadn't decided to use household items.  It's good enough for a free mask!  I used this video for directions.

All in all, I was very proud of how my dress turned out.  It was such an accomplishment to finally make a formal dress.  While I may not be attempting it again in the near future, it's good to know that I can do it if I have to.  Like I said, I told you sew!

26 February 2012

Making My Own Prom Dress: Part 2


Sewing is underway! Last week over President's Day weekend I began sewing the dress.  So far the process has been going well.  The main problem that I'm having is gathering the organza on the bodice.  It keeps on fraying, so it's not laying right over the satin.  Besides that, everything is going perfectly!  There's just three weeks left until the dress must be done, so the clock is ticking!

28 January 2012

Prom Dress Drawing

Here is the drawing that I made for my prom dress.  I made it in Photoshop and used one of the free croqui outlines that is linked on the left-hand side.  Hopefully sewing will begin shortly.